Last Updated: 24th August 2021
Sony PlayStation Dithering Removal
Table of Contents
Introduction
The Sony PlayStation from 1994 had an advanced polygon rendering & texture mapping GPU which lacked the traditional 2D background and sprite hardware of systems like the SNES or Sega Saturn. Almost every object on-screen was defined for the GPU as a textured polygon (or rectangle), whether it was pasted as a flat 2D image or mapped into 3D space.
The PlayStation could have its graphics stored in VRAM in 24-bit or 15-bit. When graphics are displayed on-screen, however, this is often reduced to 15-bit and this bit depth remapping can have optional dithering applied — which makes sense to reduce low-bitplane banding for darkened textures or Gouraud-shaded objects. It made no sense for simple 2D games with hand-drawn bitmap artwork, or for ports from old arcade games or 1980s home computers.
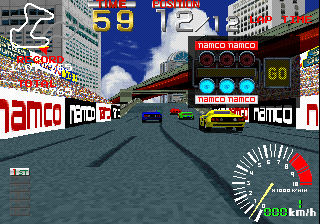
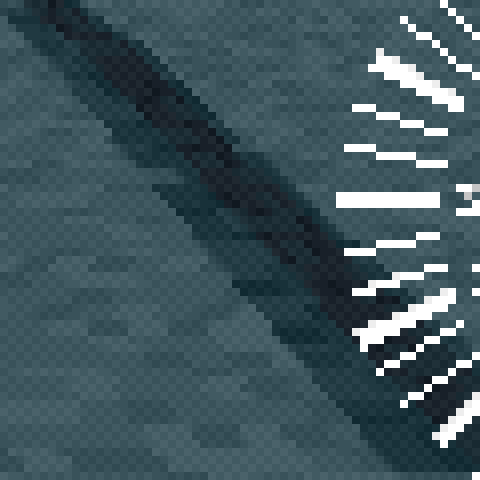
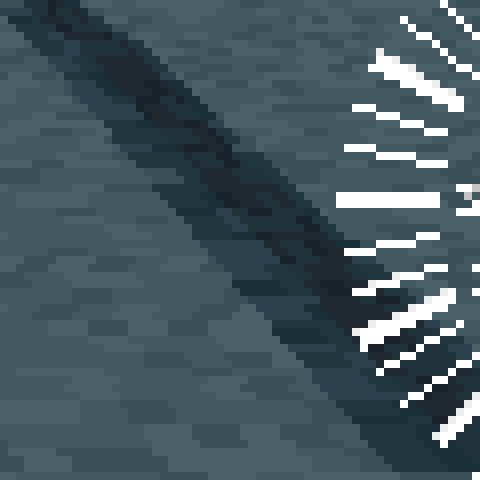
Even 3D games might suffer a bit if a texture had been (presumably) drawn originally in an art program that supported 16-bit or 18-bit colour, as the RGB values were locked to a depth similar to 15-bit, but just enough darker or brighter than the PS1’s native display such that all textures had a uniform dither applied to them. Observe the sky and road textures in Ridge Racer to the right to see this: that dithering isn’t blending more subtle shades in — it’s a 2×2 checkerboard pattern overlaid indiscriminately to large swathes of the screen. Yuck! (I say.)
Comparison Screenshots
Dithered
Undithered


Comparison Screenshots Slider
Technical Info
As far as I understand it, the PlayStation’s GPU can be accessed by the CPU via “GPU commands” sent via port writes or, alternately, via DMA. These commands set up lists of polygons for rendering, set up VRAM and textures, etc. They also modify attribute registers internal to the GPU.
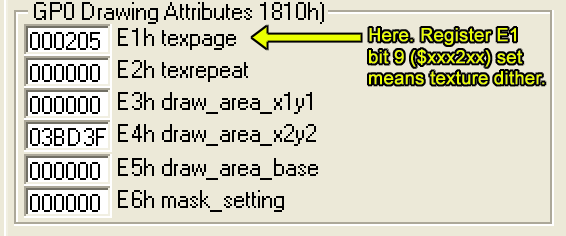
GPU Register GP0, command (subregister?) $E1 contains the bit which controls the above dithering per polygon/object. It is not a global setting. Some games store a command to this register that is identical for all objects, meaning only one code location to modify for disabling dithering: other games (Konami ones, eg.) have a different command and data for each type of graphic: background layers, “sprites”, polygonal effects, etc.
Searching for and Disabling the Dither Bit
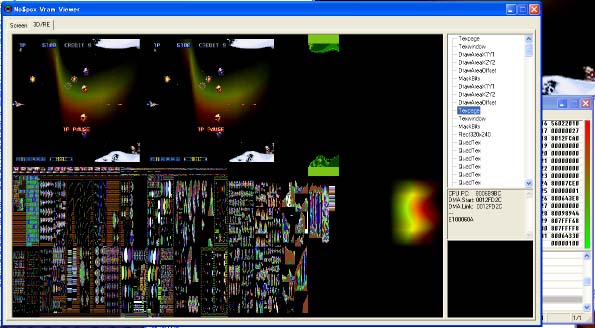
The quickest way that I found the CPU instructions that set up texture dithering was to use a PS1 emulator with a built-in debugger. Pictured below is NoCash PSX. When a game loads, you can pause the game, view a game disassembly and hex view, read PS1 technical docs, and view the GPU registers.
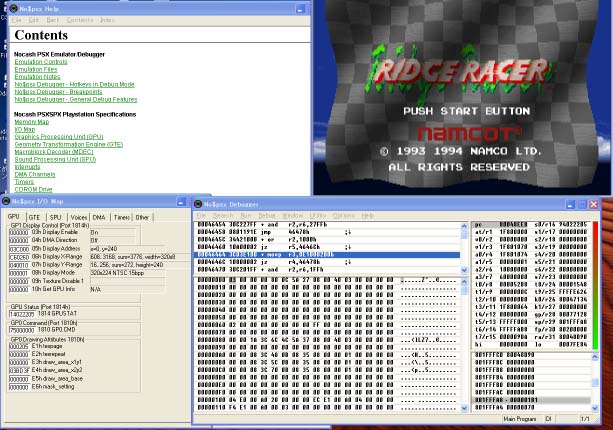
The disassembly is the most useful part since it can group disparate $E100…0200 bytes in a single operand. You should dump a full disassembly of the game (from $80000000 to $801FFFFF) to a text file and search it for “E1000200h” or “E100000h” (or even “E1000600h”, anything with bit 9 set.)
You can see clearly below how some games (like Ridge Racer) simply set the $E1 command with its direct operand together, only once in the entire executable. From this point, you can examine the RAM contents at the address found in the text search, by using the hex view in the emulator and change the $0200 value to $0000. (Of course, that appears as $00 $02 in the hex editor since the R3000 is big-endian.)
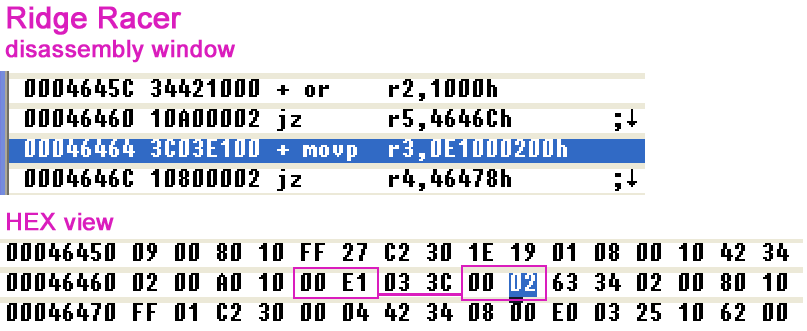
In the above image, the value to change needs to be at an even address, so as an Action Replay / GameShark code it would read as 80046468: 0000. (CPU Addresses $00000000, $80000000, and $A0000000 all are mirrors of each other, as far as I can tell. $8xxxxxxx seems to be what AR codes use.)
Alternatively, you can locate the same code in the PSX.exe of a PS1 ISO, and burn yourself a new disc with the game pre-patched.
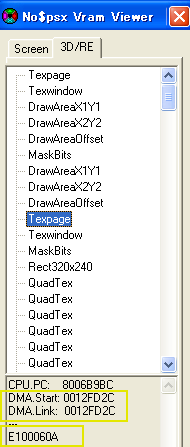
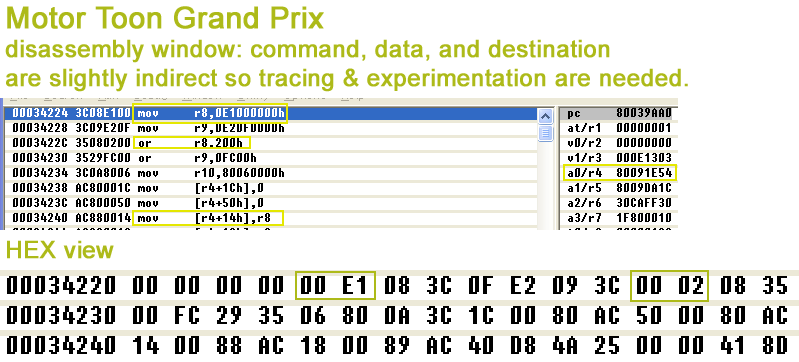
To the right you can see a game that will require a little more skill in tracing and debugging to find where exactly the $E1 command gets paired with its $0200 payload.
Several games are as convoluted as this, or worse.
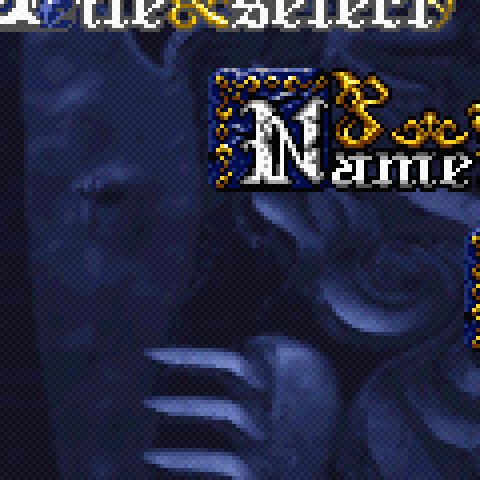
Coming to the end, from what I’ve seen, Konami games are the most egregious since the company has a large library of 2D (or pixel art-rich) games all of which have this dithering applied indiscriminately and in multiple code locations for level backgrounds, objects, title screens (see the Castlevania and SOTN pictures above…)
Tracing these dithering commands is not too difficult, but I did sometimes have to use NoCash PSX’s VRAM viewer to look at the GPU commands in a list and then to look in the RAM area where the GPU DMA list is located, and then finally trace the code that writes to that list in the first place. You might need to do this too for some other companies’ games, so it might come in handy to study the pictures to the right and below.