
Last Updated: 5th March 2021
NESRGB
Desoldering the Nintendo PPU from the Mainboard
Table of Contents
Foreword
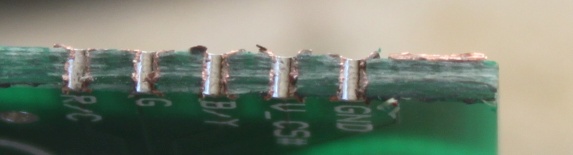
The motherboard of all Nintendo (8 bit) game consoles are those which have a copper plating on the inside of holes. In the picture is a board cut in half along a row of holes with the plating visible.
When the legs of an IC are soldered into a board like this a very good, reliable connection is made. The trouble is it can sometimes be too good, and the IC can be difficult to remove without the right tools and technique.
Here are some suggestions to help with IC removal, particularly in the case of removing the Nintendo PPU for installation of a NESRGB kit. All the Nintendo 8 bit consoles were manufactured with tin/lead (60/40) solder. So this type of solder should be used for all work on the console.
Traditional method with soldering iron, wick, and solder sucker.
The PPU can be removed with ordinary soldering tools. I recommend the following method. For this job, you will need a soldering iron with high thermal capacity. Something like a 40-watt iron or better. Use solder wick to remove solder on the IC pins on the board’s top side. Turn the board over and add a little bit of fresh solder to each of the 40 pins. This makes the old solder flow better and makes it easier to extract with a solder sucker.
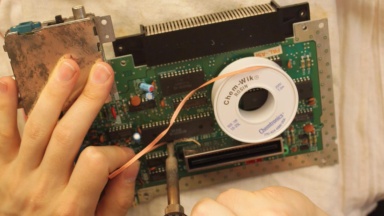
Now heat each joint, one by one and use the solder sucker to remove the solder. Some technique is required here to ensure the solder is sucked up before it is allowed to cool. Use tweezers to move each pin around in the hole to make sure it is free of solder. If there is solder stuck in the hole it sometimes helps to add fresh solder and heat the pin up for a few seconds with the iron before sucking it out with the solder sucker. Pins 14-17 and 20 are usually the most difficult because they are often connected to a ground plane. This acts as a heat sink and makes it difficult to heat the joint. Only attempt to lift the PPU from the board once all IC pins can move freely in the holes.
The efficacy of this method is dependant on the soldering iron chosen for the job. For example, it took me half an hour to remove the PPU with the 20+ year–old soldering station in the pictures. With my high-performance Thermaltronics soldering station, I can remove the PPU in about five minutes using the same method. From the feedback I’ve received, it’s fair to say 30 min to 2 hours should be expected for most people. Lots of patience is a requirement. If you feel frustrated, pack it away and try again later.

The high-tech method with specialised tools
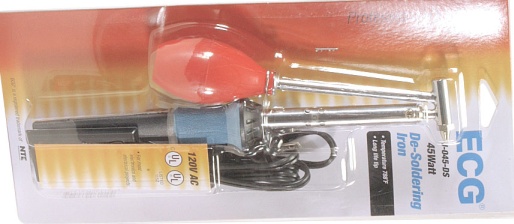
The best tool for the job is a professional desoldering gun. It’s essentially a soldering gun with a hollow tip. A suction pump is controlled by the trigger. Solder is collected in the cavity on the top.
Hakko brand models seem to be the most popular (at least in Australia). Also, the cheaper Chinese copies from Aoyue have been recommended by some NESRGB customers.

Here’s a low-cost desoldering tool available from Radio Shack in the US. Several American customers have reported that this works well for removing the Nintendo PPU.
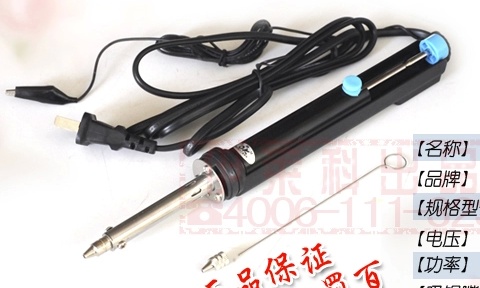
This is an interesting one from the Chinese domestic market. It appears to be a soldering iron combined with a solder sucker. Some European customers have reported that it does the job well enough.
There are other tools such as hot air guns, solder pots, etc. but I don’t consider them suitable for general recommendation for this purpose.