Last Updated: 5th March 2021
C-Sync (Leah) Modification
Hey everyone
I’ll get right into it. All of the information here is based on my reading the PS1 hardware schematics and from doing my own signal analysis (multi-meter and scope)
NOTE: dual PAL/NTSC oscillator fixes v-sync timings on both PAL and NTSC. On PAL console you cut a trace to 208-pin GPU’s pin 196 and hook up a 53.69mhz clock signal via 220ohm load. On NTSC console you cut a trace to 208-pin GPU’s pin 192 and hook up a 53.2mhz clock signal via 220ohm load.
Without this mod, NTSC games on PAL console will have v-sync 59.3hz, and NTSC consoles will have PAL games at about 50.3hz… both are wrong. With this fix, games on either mode have the correct, precise timings. This ensures 100% game compatibility and fixes issues with TVs; e.g. composite video and s-video on NTSC will now be in colour without any issues…. though only on scph5xxx and earlier. Later consoles use a clock generator which generates its own hardcoded subcarrier signal…. regardless, it fixes game compatibility.
Also, certain upscalers like the framemeister have a stuttering video output on NTSC mode on a PAL console *unless* you do the oscillator fix.
the oscillator fix also makes a PS1 ideal for speedrunning because it will have the correct timings no matter what
There *is* a dual-frequency oscillator board but it’s super expensive and in my opinion, crap because it outputs the same signal to both GPU clock inputs… my mod does it correctly, and it’s very cheap. a crystal costs like 1 USD from china and all you need is some wires, flux and some solder, also a 220ohm resistor and an Exacto knife to cut traces
I only do the oscillator mod for game/tv compatibility, but I don’t care about colour accuracy on composite video or S-Video. I recommend using an RGB cable even if you don’t need one, because it has much better picture quality. also, to further improve picture quality on RGB you should use the csync mod documented below
Dual PAL/NTSC oscillators:
NOTE: !!! Btw this is for the newer 208 pin GPU. I don’t know the pinout on the older GPU *but* on those older PS1 revisions there’s an extra space for a 2nd oscillator so add the oscillator there and BAM

NOTE: On PAL consoles, do as the image says. If NTSC console, put a 53.2mhz crystal on pin 192 instead and cut the trace leading to pin 192
NOTE: 3.3v crystals are hard to find, but 5V ones are easy to find. A crystal is just… well, a crystal! With current running through it. So the voltage doesn’t really matter anyway. I have a 5V crystal in the above picture, but it’s connected to the 3.3v line. if you wanted to be a stickler about it, you could use a logic level converter
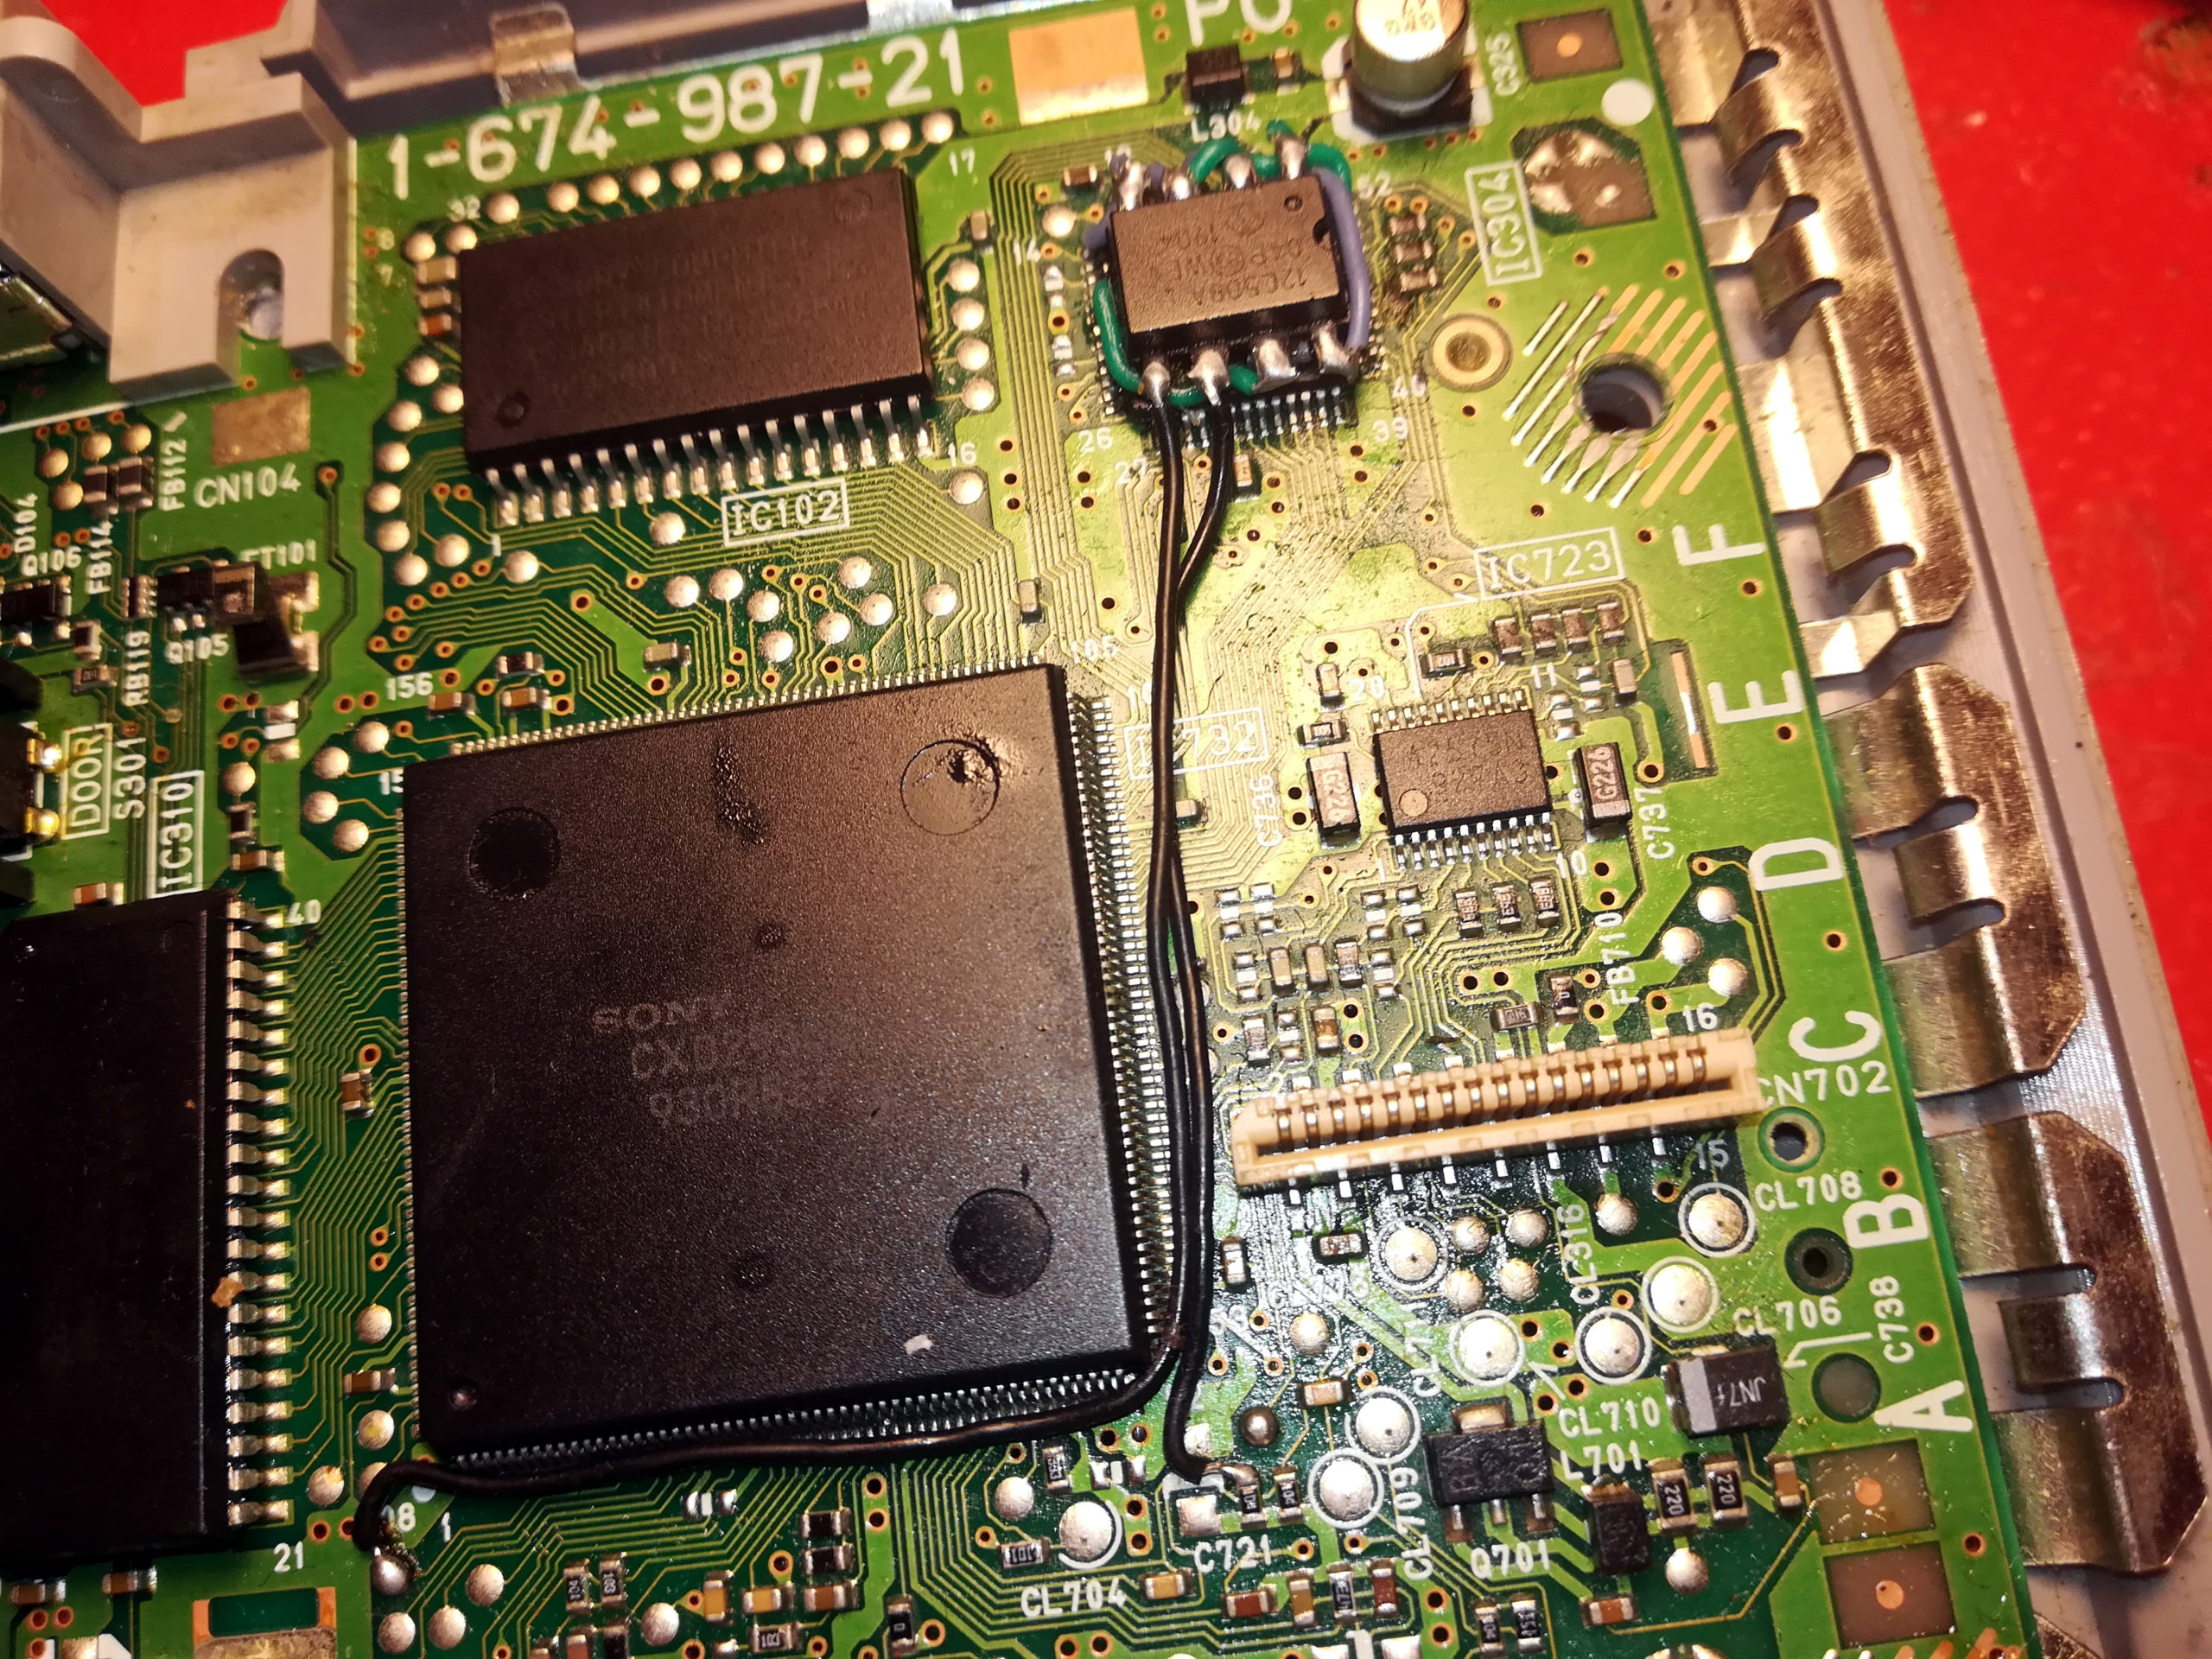
Clean CSYNC:
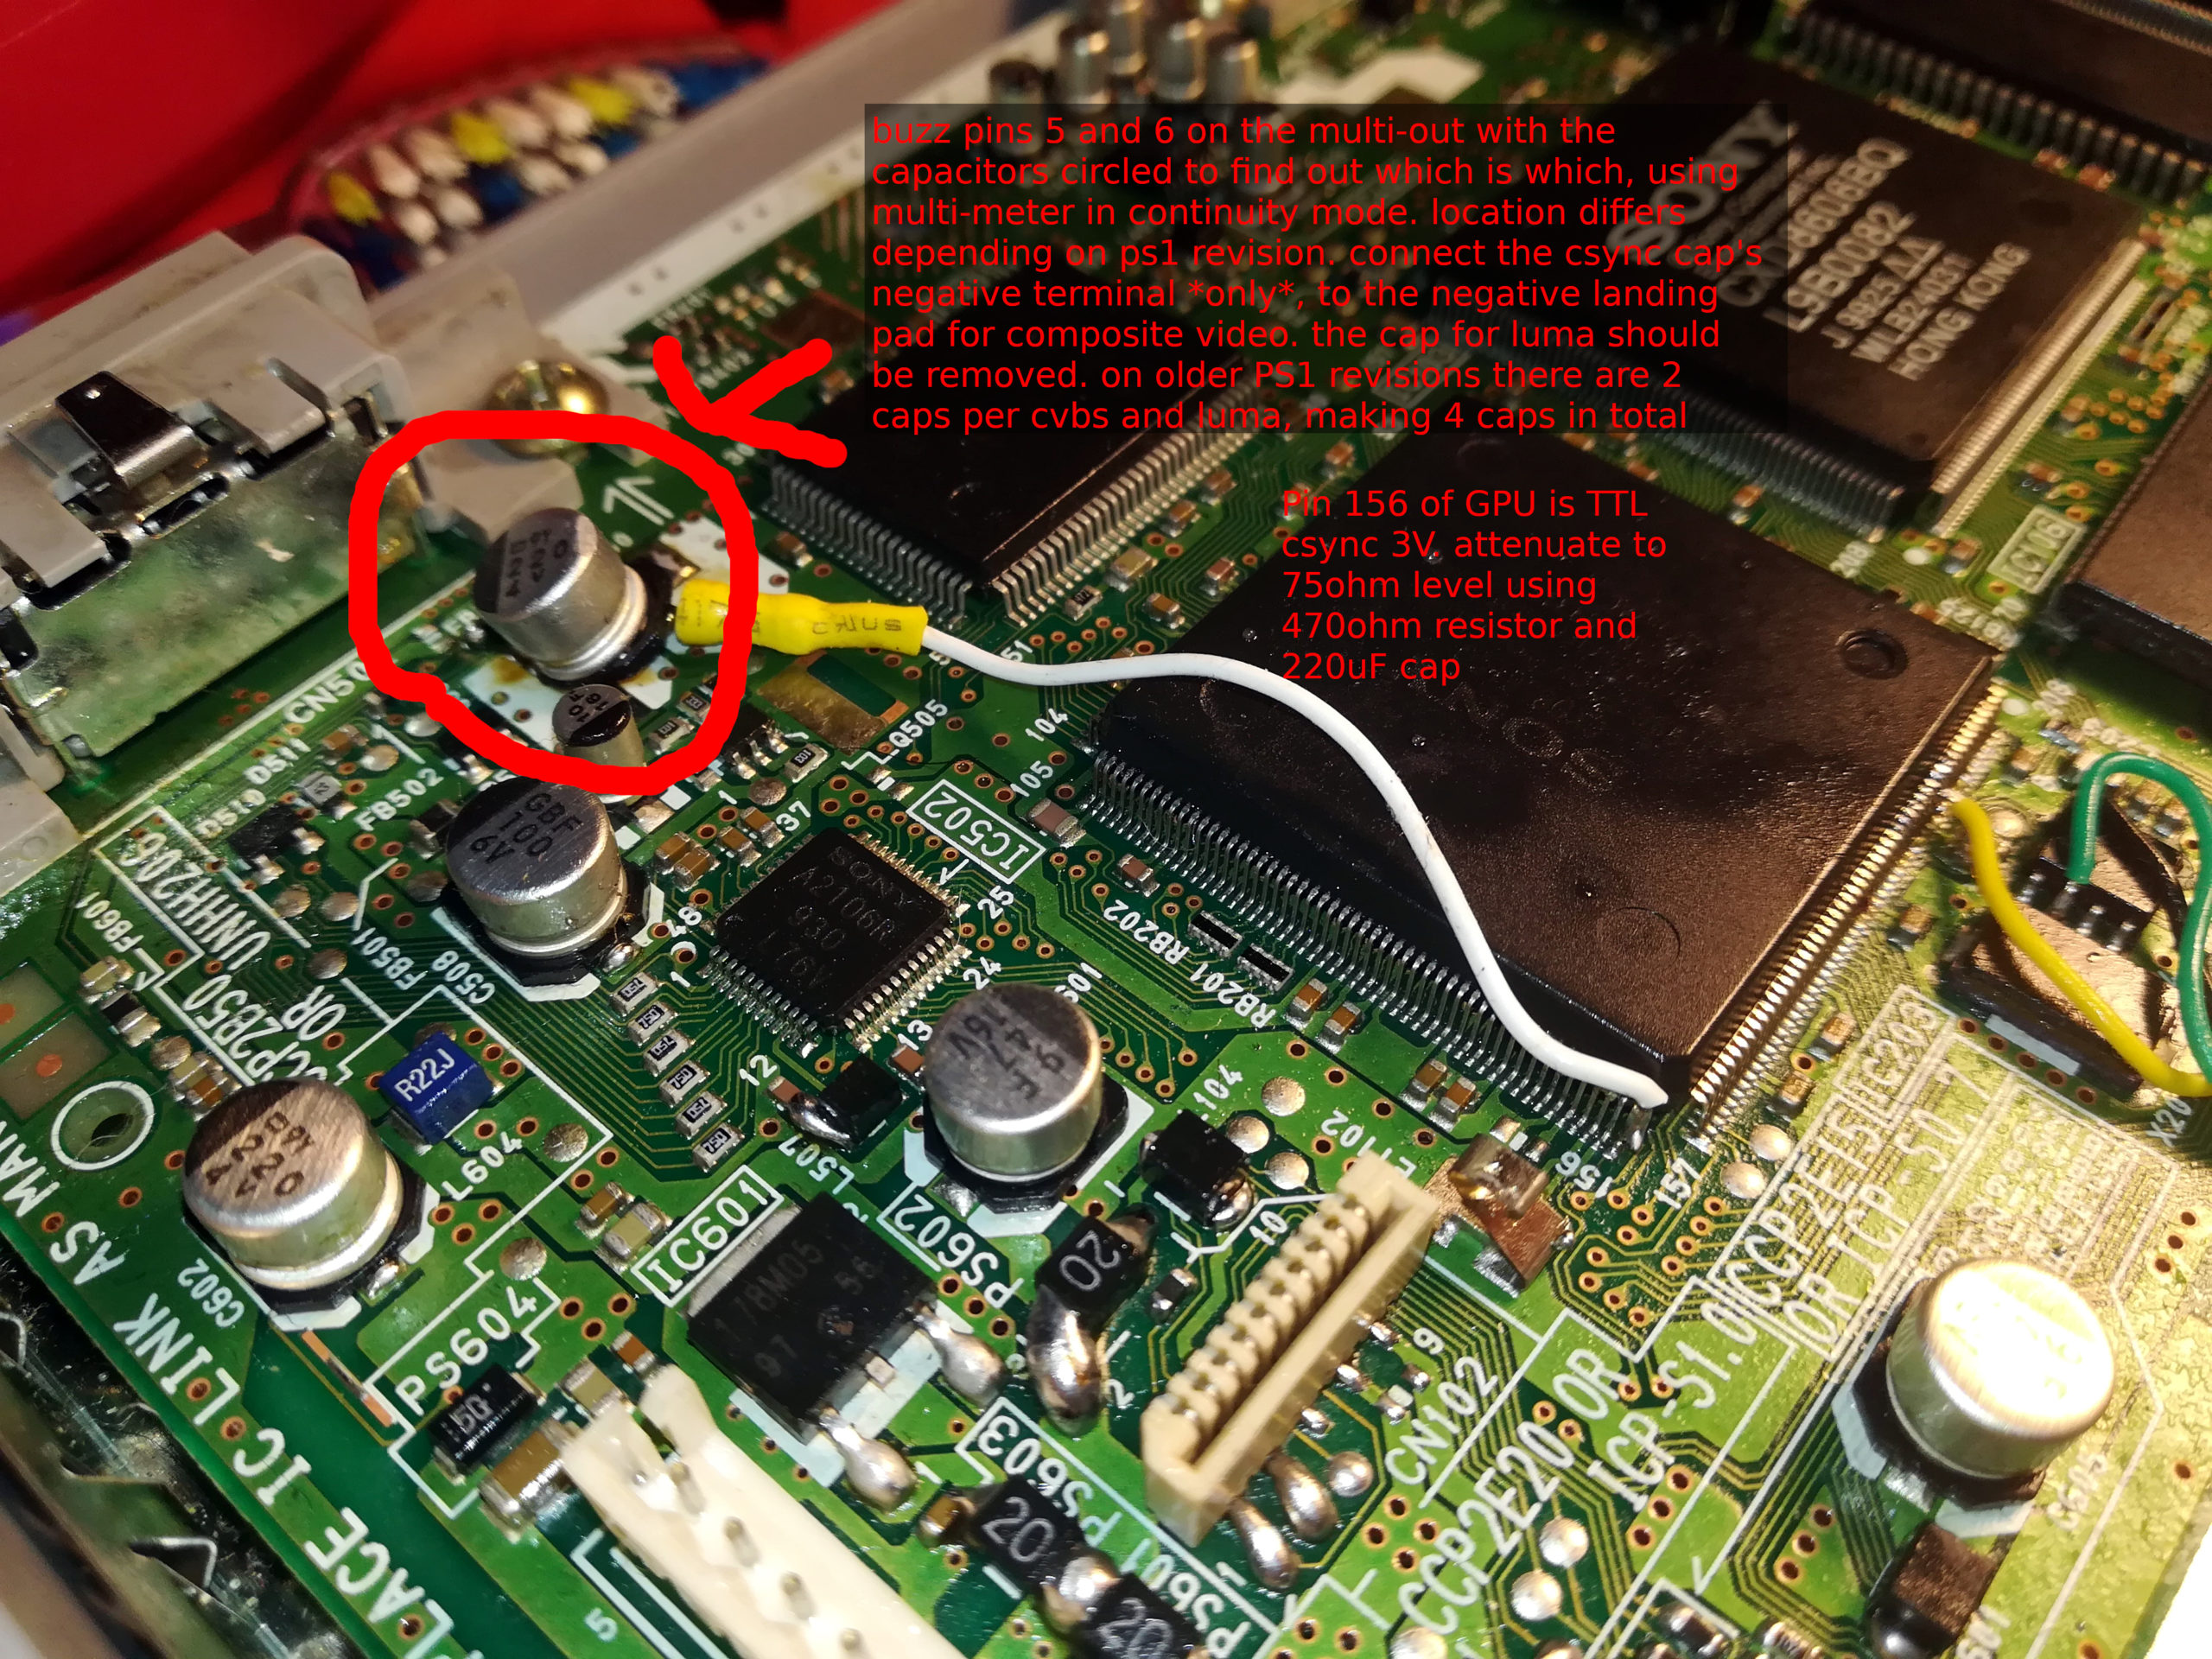
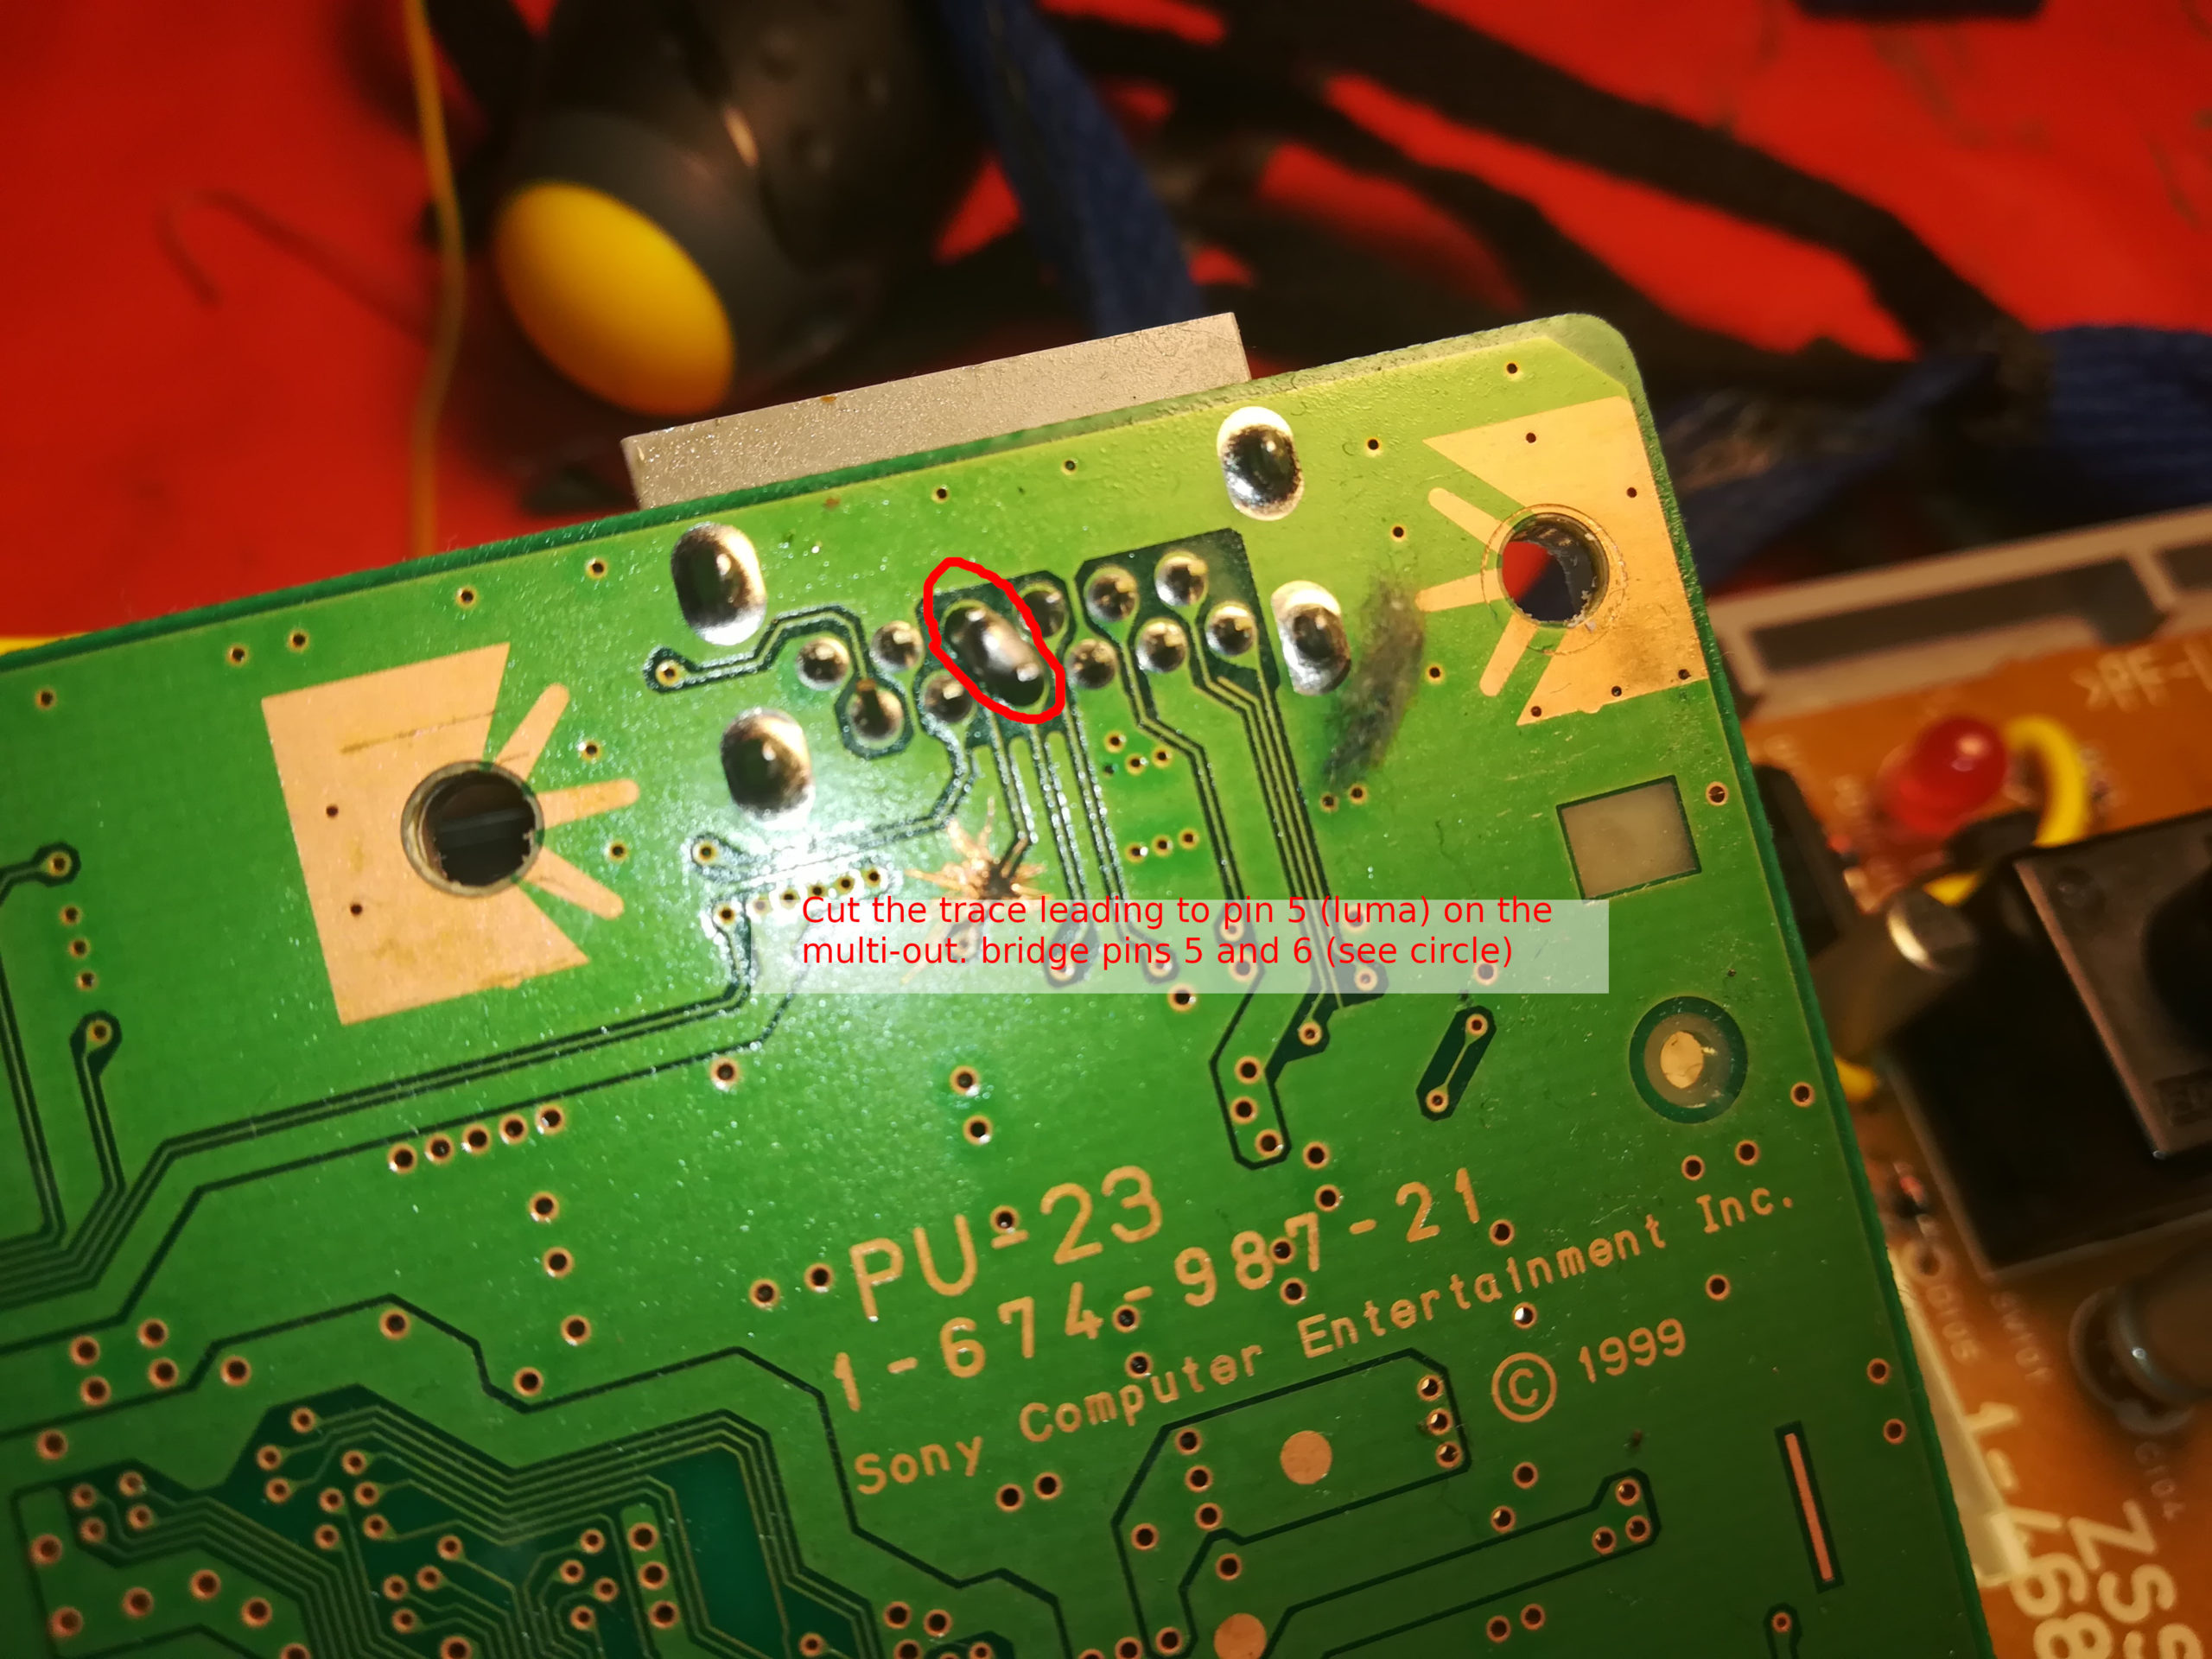
NOTE: pics are of an SCPH-9000 series. it varies per model. just buzz pin 5/6 on multi-out and find where there is continuity to find which caps are which. remove luma and CVBS caps…. yeah just look at the PCI
NOTE: C-Sync pics above are on the 208 pin GPU on newer PS1s. On the very old SCPH-1XXX models (note: some 1xxx models also have 208 pin GPU) it’s a different GPU with more pins (I forget how many and I don’t know the pinout), the video encoder itself has a CSYNC output with 75ohm load so just lookup datasheet and use 75ohm+220uF setup. Again I think the video encoder is a sony cxa1645… if it’s that one, it doesn’t have a csync output, only the input. I’m not sure what the resistor size should be because I don’t have one of these ps1s to play with…
…but the CXA1645 has the same pinout as CXA1145, and the 1145 has a C-Sync output at 75ohm load on pin 11 so get a surface mount CXA1145 and install that instead… and connect 75ohm+220uF to pin 11 on it.
IN FACT, on those super old PS1 models replace the CXA1645 with CXA1145, but don’t connect pin 20 which is composite video. Then connect pin 11 to the landing pad for pin 20. BAM!
Obligatory modchip install pic (using the Voultar method)