
Last Updated: 5th March 2021
Quickstart
Table of Contents
Install the Switchboard
- For PSIO to function, a Switch Board must be soldered onto your PlayStation® mainboard. Failure to do so will render the cartridge unusable.
- Locate the included Switch Board Kit in this box. The kit contains the Switch Board, label and wire.
- Install the Switch Board by soldering it onto your PlayStation® mainboard.
NOTE: The Switch Board installation guides and information about why this is required are available at: http://ps-io.com/switch_board
Copy the Menu System
Format an SD Card (4 GB to 32 GB Cards should be formatted as FAT32 and anything above 32 GB must be formatted as exFAT).
Download the PSIO Menu System from: http://ps-io.com/downloads
Copy and paste ‘MENU.SYS’ to the root of the SD Card.
Add Software Images
- Find an image that you would like to add to the SD Card.
- Ensure it is a PlayStation® format image (BIN, ISO or IMG extensions permitted only).
- Copy it to a folder on the SD Card. EG: ’SD:\DEMO 1\demo1.bin’ (where ’SD:\’ is the root directory).
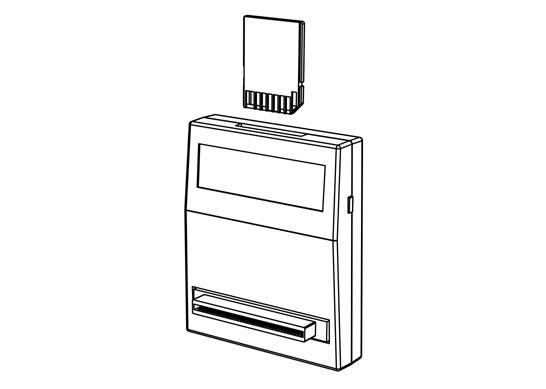
Insert the SD Card
Insert the SD Card into your PSIO Cartridge. Make sure that it is inserted in the correct direction as seen in the diagram below.
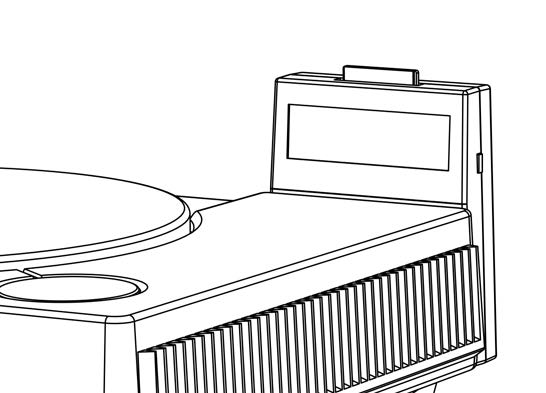
Plug In and Power On
Firmly plug your PSIO Cartridge into the PlayStation® Parallel I/O Port and power on your console (as seen in the diagram below).
Set up the Menu System
When you power on your PlayStation® the Menu System will begin the setup process.
Follow the on-screen prompts to configure the Menu System.
NOTE: If you ever need to reset the Menu System, hold [START] + [SELECT] whilst the PlayStation® is booting.
Select a Software Image
- Use the [DIRECTIONAL BUTTONS] to scroll through the list of software images and press the [CROSS] button to make a selection.
- Press the [CROSS] button again to boot the selected software image.
- To select a new software image, press the [RESET] button on the PlayStation® console.
Basic Troubleshooting
It is strongly recommended that your PSIO cartridge is up-to-date with the latest firmware(s). For information on how to update, please refer to the ‘Systems Manual’ here: http://ps-io.com/downloads
If you have any other issues with your cartridge or if further issues persist, please report them here: http://ps-io.com/problem
Frequently Asked Questions
Q: When I select my image why do I get a message saying “No Image Found”?
A: Make sure that the software image filename does not exceed 60 characters and is either a BIN, ISO or IMG file.
Q: When I plug in my PSIO Cartridge why does it not boot to the Menu System?
A: Ensure that you have installed the Switch Board correctly and the ‘MENU.SYS’ file has been copied to the root of the SD Card.
Also check that the PlayStation® Parallel I/O Port is not corroded or damaged and that the cartridge is plugged in firmly.
Q: My software images are not playing any audio. Why can’t I hear any music or background audio?
A: Most software images use Compact Disc Digital Audio (CDDA). To learn how to enable CDDA, please refer to the ‘Systems Manual’ here: http://ps-io.com/downloads