
Last Updated: 5th March 2021
DCDigital Web Console
Table of Contents
How to connect
If your DCHDMI is already connected to your local WiFi network:
- Open the OSD and go to
WiFi Setup. - Make sure it says
[Connected]instead of[Access point]on the screen.
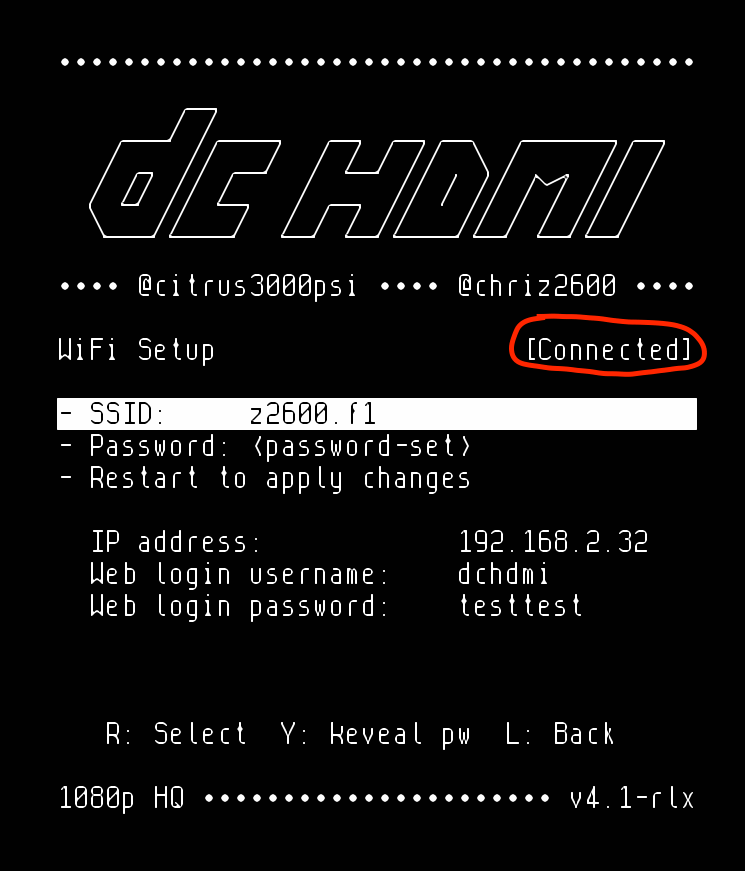
- Press
Yto reveal theWeb login password. You can skip that if you set a password in the Web console’s setup. - Use a browser of your choice and enter the IP address shown next to IP address in the browsers address bar. If you are using macOS or Linux with a running avahi daemon or Windows with iTunes installed, you can also use DCHDMI’s zeroconf-
Hostname(default:dc-firmware-manager.local) - A login window should open. Enter
Web login usernameandWeb login password. - A command prompt should be displayed.
How to update the Firmware from the web console
This assumes your DCHDMI is connected to a WiFi network.
- Connect to the web console.
- Optional: use
checkto see, if a new firmware is available. downloadnew firmwareflashnew firmwareresetDCHDMI to (re-)start with the new firmware.
Commands
Basic commands
| Command | Description |
|---|---|
| config | Show current DCHDMI configuration data |
| setup | Enter setup mode, to edit configuration |
| check | Check for new firmware using Firmware Server and Firmware Version configuration data |
| download | Download firmware from Firmware Server to staging area |
| flash | Flash firmware from staging area |
| reset | Reset DCHDMI. This also resets the Dreamcast |
| help | Show available basic commands |
| helpexpert | Show available expert commands |
| clear | Clear terminal screen |
| exit | Exit terminal |
Expert commands
| Command | Description |
|---|---|
| check[type](1) | Check for new type firmware using Firmware Server and Firmware Version configuration data |
| select | Select a file to upload from your computer |
| upload[type] | Upload selected file to staging area for type |
| file | Print information about selected file |
| download[type] | Download type firmware from Firmware Server to staging area |
| flash[type] | Flash type from staging area |
| reset[type](2) | Reset type |
| cleanup | Remove all staged firmware files and forget about previously flashed versions |
| ls | List files in filesystem |
(1) [type]: fpga, esp or index
(2) There is no resetindex command
Special commands
| Command | Description |
|---|---|
| flashfpgasecure | Flash FPGA firmware while disabling the FPGA |
| banner | Print DCHDMI banner |
| get_mac | Print MAC address of DCHDMI |
| flash_chip_size | Print ESP flash chip size |
| res_[resolution](1) | Switch to resolution |
| deinterlace_[deint](2) | Use deinterlacer deint (only works in 15kHz mode) |
| generate_on | Generate test video image |
| generate_off | Disable test video image |
| testdata | Shows test screen |
| resetpll | Reset PLL |
| osd (on,off) | Show/hide OSD |
| hq2x (on,off) | Activate/deactivate HQ2X filter (only in 960p/1080p mode with Relaxed firmware active) |
| 240p_offset ([0-9]+) | Set offset for 240p mode (pixel x2) |
| osd (on,off) | Show/hide OSD |
| spi_flash_erase | Erase FPGA configuration memory |
osdwrite\[column]\[row]\"[text]" | Write [text] to OSD starting at [column]/[row] |
(1) [resolution]: vga, 480p, 960p or 1080p
(2) [deint]: bob or passthru